Geotagging
For thousands of years, humans have had the compulsion to note where they had traveled by inscribing their name or glyph on a stone or tree to indicate that ‘Kilroy was here’. Ancient Egyptian monuments bare inscriptions from Greek travelers a thousand years later noting that some unknown travelers had arrived there to admire the view. We have this same compulsion expressed through the millions of ‘selfies’ taken every day around the world and shared through various social media platforms and applications such as Flickr, Instagram and Pinterest among many others.
GOOGLE Maps is an extremely popular app available on smartphones, laptops and other platforms for day-to-day navigating. By opening an account on GOOGLE-Plus, you can create photo albums and upload the images to the GOOGLE Maps application. However, instead of using the geotagging information, you simply associate your photo with some well-known landmark, business or institutional location. This works well for locations on Earth that are part of the GOOGLE Maps GIS location database, but unfortunately you cannot associate your photos with off-the-road scenery. Only locations and business establishments already included in the GOOGLE GIS archive will be noted on the open public maps and not the pins and images you created.
The only way to have your images posted publically for unlimited viewing around the world is to add your images to the location of a pre-existing landmark or business. If you are near a park, a public monument, a business establishment, or a religious institution, for example, you can click on that location, and in the right-hand information window scan down to the ‘add a photo’ feature. Your contribution will be added to the end of what may be a very long string of thumbnail images for popular locations. You will need to have a GOOGLE+ account and profile in order for the photo to be added with your name and descriptions.
There are two ways in which you may now publically share your eclipse images. Below we provide a step-by-step process for how to do this.
From Your Desktop
- Create a custom GOOGLE Map as follows:
- Open https://www.google.com/maps/d/
- Sign-in to your GOOGLE account
- Click on the ‘Create A New Map’ bar in the upper left.
- In the Search bar enter the town you are in. GOOGLE will show you a map of the enlarged area
- Use the ‘hand’ tool to move to the area you are interested in and use the +/- bar or mouse scroll wheel to enlarge to a comfortable viewing scale showing your location.
- Click on the ‘Untitled Map’ title and a window opens where you can rename your map and add a brief description. Close this window and in the left-hand bar your new map name will appear.
- Click on the ‘Untitled Layers’ box and a window opens for you to name this map layer. Example ‘Photos’. Close the window.
- From the tool menu below the search bar, select the pin symbol and move it to your location. A window opens up for you to rename this point and add a description. When you are finished click ‘save’. On the far-right info window under your layer ‘Photos’ you will see this point name opposite a thumbtack symbol. Repeat this step for any other locations you want to mark on your map. Note if you click on the ‘Individual Styles’ text it will open a color menu from which you can change the color of any of your place markers to further organize what kind of content you offer at that location (pictures, videos, text etc). You can create additional layers for your map by clicking on ‘add layers’. Each of these can then be used to organize your photos or your journeys. By activating or deactivating a layer you can select what information you want to display on your map, and any particular colorization you want to use for the place markers.
- Note that in every pin information box, along the bottom there are various icons including a camera icon. Click on the camera icon to upload an image or a video to this pinned location.
- A window opens with ‘upload’ highlighted and a notice saying ‘Select a file from your computer’. If you follow this step and select from your desktop folder an appropriate image.
- Continue adding pins and images to your map until you have finished loading all the ones you would like to geographically locate in this way. Note that each pin location allows you to add multiple photos to the same location by opening the pin information window and clicking on the camera icon.
- When you are finished entering the information, re-fresh the map to a comfortable size, and go to the top right window opposite your map name. Click on the three vertical dots to open the dropdown menu and select ‘default view’. The view that you selected will now be the view that comes up when this map is opened, rather than the ‘full earth’ default view used by GOOGLE Maps normally. If you select ‘Export to KML’ the contents of your map will be downloaded to your desktop. You can then send this file via email to your friends, who can then import this file into their GOOGLE Maps to view it privately.
- On the right-hand window there is a feature called ‘share’. If you want anyone to view your map using Facebook or other social media, click on this link. A window will open called ’Sharing settings’. The first line is the URL of this map on GOOGLE Drive. On the ‘Who has access’ you can select ‘Public on the web’ so that anyone can view your map and its contents including your comments, descriptions, pictures and videos. Further down in this window select under Access ‘can view’ so that the public can see your information but cannot edit it. This is recommended to avoid inappropriate information being added to your work. At the top of this Sharing Settings window, click on the Facebook icon to share this map on your Facebook page. A window will open up for you to log onto your Facebook account and add a text. If you click on the G+ icon the map will be added to your GOOGLE+ directory.
- If you click on the vertical dots opposite the map name and select ‘embed on my site’ it now gives you the public-accessible HTML code line and URL that you can add to your webpage.
- On your GOOGLE Drive, this map will be saved for you to share with other people in your group.
- If you visit your Facebook account you will see this GOOGLE Map posted on your timeline, which you can then share with your friends in the usual way. Clicking on this posting will open up your map in GOOGLE Maps.
Uploading with your smartphone
- Download the free GOOGLE Maps app to your smartphone
- From your ‘camera’ app, take a photo
- Open Google Maps
- Enter the name of the location nearest you.
- After enlarged map view of location opens, at the bottom is a bar with the name of the location.
- Swipe up on the bar and scroll through the information until you see ‘Add Photo’
- Tap on ‘Add Photo’ and select from either ‘Take a photo’ or ‘Choose from library’.
- If you have the photo in your smartphone photo archive, tap ‘choose from library’, otherwise take a fresh new photo with your phone, which GOOGLE Maps will automatically start-up if you select the ‘Take a Photo’ option.
- If you selected the library feature, tap on the image you want to upload. It will then ask you to add a caption. When finished, tap ‘Post’ at top of screen opposite your name. Your contribution will be added to the locations photo archive for others to view.
You can only add photos for pre-existing points of interest such as businesses or parks, but not street addresses or geographic coordinates.
Submit Photos to NASA
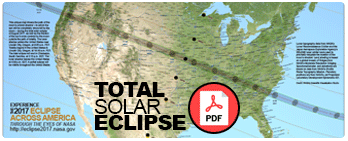
Selfies are a great way to tell your friends that; YOU WERE THERE! The August 21, 2017 eclipse will be observable on four continents. Where will you be? Why not celebrate the eclipse by taking a selfie of you and the eclipse and adding it to NASA's Solar Eclipse Flickr Group or on Instagram by using #EclipseSelfie. Be creative but be safe! NEVER look directly at the sun or through your camera's view finder. Include a brief description and the phrase, “I saw the 2017 total solar eclipse”! For more information visit the NASA webpage: https://eclipse2017.nasa.gov/3d-printable-pinhole-projectors